I Built a Portfolio That Lives in Your Terminal — SSH Access, Go, Docker, GCP Free Tier
A step-by-step guide to building an SSH server in Go that renders a TUI portfolio inside anyone's terminal hosted for free on GCP.
Every step. Every mistake. Nothing skipped.
If you haven't read the story behind why I built this, start here → My Portfolio Has No URL. Just an SSH Command.
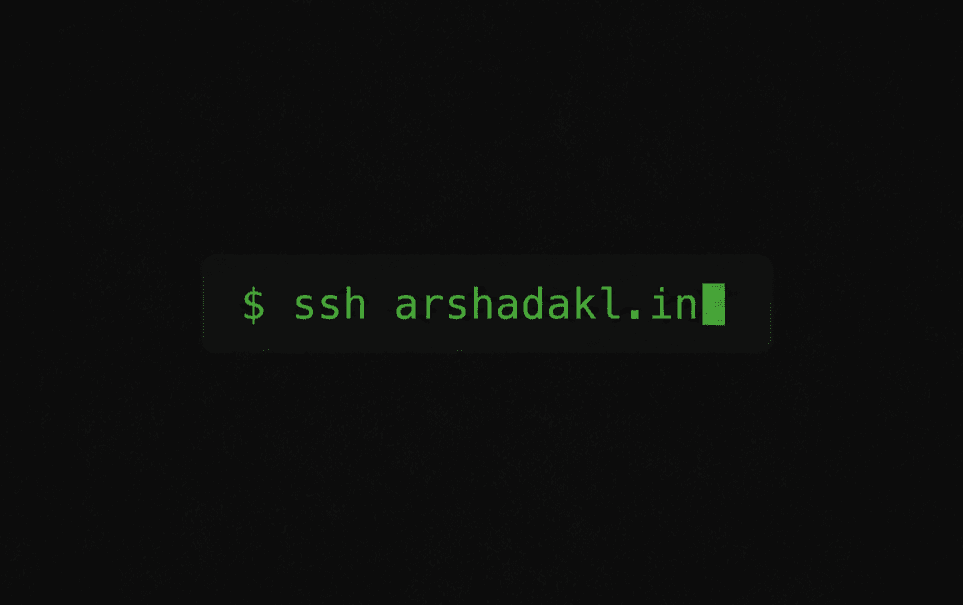
if you want to see what we're building, open your terminal and try this:
ssh arshadakl.inOr visit the website version: arshadakl.in
That's the end result. Now let's build it.
What We're Building
yourdomain.com
 ├── Browser  → port 443 → Nginx → your website
 └── Terminal → port 22  → Docker → Go SSH app
One server. One domain. Two completely different experiences depending on how you connect.
By the end of this you'll have:
A Go SSH app that renders a TUI portfolio in anyone's terminal
The same domain serving your website in the browser
Docker isolation, Nginx reverse proxy, free SSL
Total cost: ₹0/month on GCP free tier.
Part 1 GCP Free Tier VM
Google Cloud has a permanently free e2-micro VM. Not a trial. Permanently free but only if you get these settings exactly right.
Settings That Must Be Correct
| Setting | Required Value |
|---|---|
| Machine type | e2-micro only |
| Region | us-central1, us-east1, or us-west1 |
| Disk type | Standard persistent disk |
| Disk size | 30 GB max |
⚠️ Any other region and you will be charged. The free e2-micro is US-only.
Create the VM
GCP Console → Compute Engine → VM Instances → Create Instance
| Field | Value |
|---|---|
| Name | anything you like |
| Region | us-central1 |
| Zone | us-central1-a |
| Machine type | e2-micro |
| Boot disk OS | Ubuntu 24.04 LTS |
| Boot disk type | Standard persistent disk |
| Boot disk size | 30 GB |
| Firewall | ✅ Allow HTTP ✅ Allow HTTPS |
Click Create. Wait ~60 seconds.
Reserve a Static IP
Without this your IP changes on every reboot and your DNS breaks.
VPC Network → IP Addresses → Reserve External Static Address
| Field | Value |
|---|---|
| Name | portfolio-ip |
| Region | us-central1 |
| Attached to | your VM |
Note this IP down. You'll need it for DNS later.
⚠️ Static IP is free only when attached to a running VM. If you stop the VM, detach the IP first or you'll be charged ~$3/month for an idle IP.
Set a Billing Alert
Do this before anything else.
Billing → Budgets & Alerts → Create Budget → Amount: $1 → Alert at 100% → your email.
If anything accidentally goes outside free tier, you'll know before it costs you anything.
Part 2 Server Setup
Click the SSH button next to your VM in GCP Console. This opens a browser terminal. Run all commands below here.
Move Real SSH to Port 2234
Your portfolio app needs to listen on port 22 so visitors can ssh yourdomain.com without specifying a port. But your server's real OpenSSH also lives on port 22 by default.
One of them has to move. We move the real one to 2234 and give 22 to the app.
First open port 2234 in GCP firewall:
VPC Network → Firewall → Create Firewall Rule
| Field | Value |
|---|---|
| Name | allow-mgmt-ssh |
| Direction | Ingress |
| Source IP | 0.0.0.0/0 |
| Protocol/Port | TCP: 2234 |
Now on the server:
sudo nano /etc/ssh/sshd_config
Find #Port 22 and change to:
Port 2234
Save (Ctrl+X → Y → Enter) then:
sudo systemctl restart ssh
⚠️ Before closing your terminal, open a new GCP browser SSH tab and verify it still connects. The GCP browser SSH button tunnels through Google's infrastructure and works regardless of which port OpenSSH is on it's your permanent backup if you ever lock yourself out. I learned this the hard way.
From now on to SSH from your laptop:
ssh -p 2234 username@yourdomain.com
Install Everything
sudo apt update && sudo apt upgrade -y

# Docker
curl -fsSL https://get.docker.com | sudo sh
sudo usermod -aG docker $USER
newgrp docker

# Nginx + Certbot
sudo apt install nginx certbot python3-certbot-nginx -y

# Firewall
sudo apt install ufw -y
Configure UFW
sudo ufw default deny incoming
sudo ufw default allow outgoing
sudo ufw allow 22/tcp      # portfolio SSH app public facing
sudo ufw allow 80/tcp
sudo ufw allow 443/tcp
sudo ufw allow 2234/tcp    # your management SSH
sudo ufw enable
Note: port 22 here is now public internet access to your Go app not your real SSH server. Your real SSH is on 2234. Keep this distinction in mind.
At this point the server is ready. Now we can start on the actual application.
Part 3 Understanding the SSH Architecture
Before writing code, it's worth understanding what's actually happening when someone connects.
Normally when you SSH into a machine, OpenSSH launches a shell Bash or Zsh as the session. That shell is what you type commands into.
Wish replaces that idea entirely.
Instead of launching a shell, it launches your Go application as the SSH session itself. From the client's perspective it's a completely valid SSH connection same protocol, same fingerprint handshake, same yes/no prompt on first connect. But the "terminal" they're interacting with is actually your Go application rendering whatever UI you built.
No shell is ever involved. No system access. The visitor sees only what you render.

This is the core insight that makes the whole thing work.
Part 4 The Go SSH App
The Mistake That Will Cost You an Hour
Build a Bubbletea app, test it locally, looks great, drop it into Docker:
Error: could not open a new TTY: open /dev/tty: no such device or address
A standalone Bubbletea program calls tea.NewProgram() which tries to open a TTY on the server itself. Inside Docker there's no TTY instant crash on every startup.
The fix is wrapping your Bubbletea model inside a Wish SSH server. Each visitor gets their own Bubbletea instance running inside their own terminal. The server never needs a TTY at all.
Wrong crashes in Docker:
func main() {
    p := tea.NewProgram(NewModel(), tea.WithAltScreen())
    p.Run() // tries to attach to server TTY fails in Docker
}
Correct Wish-wrapped, each session gets its own instance:
func teaHandler(s ssh.Session) (tea.Model, []tea.ProgramOption) {
    pty, _, _ := s.Pty()
    m := NewModel()
    m.width = pty.Window.Width
    m.height = pty.Window.Height
    return m, []tea.ProgramOption{tea.WithAltScreen()}
}

func main() {
    s, _ := wish.NewServer(
        wish.WithAddress("0.0.0.0:22"),
        wish.WithHostKeyPath("/app/keys/id_ed25519"),
        wish.WithMiddleware(
            bubbletea.Middleware(teaHandler),
            logging.Middleware(),
        ),
    )
    s.ListenAndServe()
}
Minimal Starter Project
go.mod
module ssh-portfolio

go 1.25

require (
    github.com/charmbracelet/bubbletea v1.3.4
    github.com/charmbracelet/lipgloss v1.1.0
    github.com/charmbracelet/wish v1.4.5
)
main.go
package main

import (
    "context"
    "fmt"
    "os"
    "os/signal"
    "syscall"
    "time"

    tea "github.com/charmbracelet/bubbletea"
    "github.com/charmbracelet/lipgloss"
    "github.com/charmbracelet/ssh"
    "github.com/charmbracelet/wish"
    "github.com/charmbracelet/wish/bubbletea"
    "github.com/charmbracelet/wish/logging"
)

type model struct {
    width  int
    height int
}

func (m model) Init() tea.Cmd { return nil }

func (m model) Update(msg tea.Msg) (tea.Model, tea.Cmd) {
    switch msg := msg.(type) {
    case tea.KeyMsg:
        if msg.String() == "q" || msg.String() == "ctrl+c" {
            return m, tea.Quit
        }
    case tea.WindowSizeMsg:
        m.width = msg.Width
        m.height = msg.Height
    }
    return m, nil
}

func (m model) View() string {
    return lipgloss.NewStyle().
        Width(m.width).
        Height(m.height).
        Align(lipgloss.Center, lipgloss.Center).
        Foreground(lipgloss.Color("208")).
        Render("Your Name\nSoftware Engineer\n\nPress q to quit")
}

func teaHandler(s ssh.Session) (tea.Model, []tea.ProgramOption) {
    pty, _, _ := s.Pty()
    return model{
        width:  pty.Window.Width,
        height: pty.Window.Height,
    }, []tea.ProgramOption{tea.WithAltScreen()}
}

func main() {
    s, err := wish.NewServer(
        wish.WithAddress("0.0.0.0:22"),
        wish.WithHostKeyPath("/app/keys/id_ed25519"),
        wish.WithMiddleware(
            bubbletea.Middleware(teaHandler),
            logging.Middleware(),
        ),
    )
    if err != nil {
        fmt.Fprintln(os.Stderr, err)
        os.Exit(1)
    }

    done := make(chan os.Signal, 1)
    signal.Notify(done, os.Interrupt, syscall.SIGINT, syscall.SIGTERM)
    fmt.Println("SSH portfolio running on :22")
    go s.ListenAndServe()
    <-done

    ctx, cancel := context.WithTimeout(context.Background(), 30*time.Second)
    defer cancel()
    s.Shutdown(ctx)
}
Dockerfile
FROM golang:1.25-alpine AS builder
WORKDIR /app
COPY go.mod go.sum ./
RUN go mod download
COPY . .
RUN go build -o portfolio .

FROM alpine:latest
RUN apk --no-cache add ca-certificates
WORKDIR /app
RUN adduser -D -s /bin/sh appuser
RUN mkdir -p /app/keys && chown -R appuser:appuser /app/keys
COPY --from=builder /app/portfolio .
RUN chown appuser:appuser /app/portfolio
USER appuser
EXPOSE 22
CMD ["./portfolio"]
⚠️ Use
golang:1.25-alpinenotgolang:1.22-alpine. If yourgo.modrequires a newer version the build fails with a confusing GOTOOLCHAIN error that points you in the wrong direction.
Part 5 Build and Run
Before running the container, create a volume for the SSH host key. This is important without it, every container restart generates a new host key which changes the fingerprint and breaks known_hosts for anyone who connected before.
docker volume create portfolio-keys
Now clone and build:
git clone https://github.com/yourusername/ssh-portfolio.git
cd ssh-portfolio
docker build -t portfolio-ssh .
Run:
docker run -d \
  --name portfolio-ssh \
  --restart unless-stopped \
  --security-opt no-new-privileges:true \
  --memory="128m" \
  --cpus="0.5" \
  -p 22:22 \
  -v portfolio-keys:/app/keys \
  portfolio-ssh
Two Docker Flags That Will Waste Your Time
--no-new-privileges this syntax is invalid in Docker CLI. Use --security-opt no-new-privileges:true
--cap-drop ALL sounds like good security hardening. Actually blocks chmod on the keys directory. App crashes on every startup with a permission denied error. Skip it.
Verify
docker ps
# STATUS should say "Up X minutes" not "Restarting"

docker logs portfolio-ssh
# Should show: SSH portfolio running on :22
Test from your laptop:
ssh YOUR_GCP_STATIC_IP
Type yes on the fingerprint prompt. Your TUI should appear.
A Note on Security
Since port 22 is now publicly exposed, you'll immediately start seeing random SSH connection attempts from bots scanning the internet. That's completely normal.
Your Go app isn't exposing a shell so there's no real risk but treat it like any public-facing service. Install fail2ban to automatically ban IPs that hammer your port:
sudo apt install fail2ban -y
sudo systemctl enable fail2ban
sudo systemctl start fail2ban
And keep the server updated regularly.
Part 6 Domain Setup
Two Paths
Path A Website Also on GCP
Simplest setup. Nginx serves your website directly. No proxying needed.
server {
    listen 80;
    server_name yourdomain.com www.yourdomain.com;
    return 301 https://\(host\)request_uri;
}

server {
    listen 443 ssl;
    server_name yourdomain.com www.yourdomain.com;

    ssl_certificate /etc/letsencrypt/live/yourdomain.com/fullchain.pem;
    ssl_certificate_key /etc/letsencrypt/live/yourdomain.com/privkey.pem;

    root /var/www/html;
    index index.html;
    location / {
        try_files \(uri \)uri/ =404;
    }
}
Path B Website on Vercel / Netlify
Change the A record to point to GCP. Nginx proxies browser traffic back to your hosting provider. Visitors never notice website loads normally, SSH app works on the same domain.
server {
    listen 80;
    server_name yourdomain.com www.yourdomain.com;
    return 301 https://\(host\)request_uri;
}

server {
    listen 443 ssl;
    server_name yourdomain.com www.yourdomain.com;

    ssl_certificate /etc/letsencrypt/live/yourdomain.com/fullchain.pem;
    ssl_certificate_key /etc/letsencrypt/live/yourdomain.com/privkey.pem;

    location / {
        proxy_pass https://your-project.vercel.app;
        proxy_set_header Host your-project.vercel.app;
        proxy_set_header X-Real-IP $remote_addr;
        proxy_set_header X-Forwarded-For $proxy_add_x_forwarded_for;
        proxy_set_header X-Forwarded-Proto https;
        proxy_ssl_server_name on;
        proxy_ssl_name your-project.vercel.app;
    }
}
⚠️ Use your
.vercel.appURL as bothproxy_passandHostheader not your custom domain. Using the custom domain returns a 403 because Vercel rejects requests for a domain whose DNS no longer points to them. This one took a while to figure out.
DNS Change
In your domain registrar:
| Type | Name | Value |
|---|---|---|
| A | @ | YOUR_GCP_STATIC_IP |
| A | www | YOUR_GCP_STATIC_IP |
Wait 15-30 minutes for propagation:
dig yourdomain.com
# Your GCP IP should appear under ANSWER SECTION
Enable Nginx
sudo ln -s /etc/nginx/sites-available/yourdomain.com /etc/nginx/sites-enabled/
sudo rm -f /etc/nginx/sites-enabled/default
sudo nginx -t
sudo systemctl reload nginx
Part 7 SSL
Once DNS is pointing to your server:
sudo certbot --nginx -d yourdomain.com -d www.yourdomain.com
Certbot auto-configures HTTPS and sets up auto-renewal. Free forever via Let's Encrypt.
Part 8 Test Everything
# SSH portfolio
ssh yourdomain.com
# Your TUI should appear

# Website
curl -I https://yourdomain.com
# Should return 200

# Management SSH
ssh -p 2234 username@yourdomain.com
# Should give you server shell
Known Hosts Warning After Redeploy
After redeploying you'll see:
WARNING: REMOTE HOST IDENTIFICATION HAS CHANGED!
Your laptop cached the old fingerprint. Fix:
ssh-keygen -R yourdomain.com
This only affects you new visitors have no cached key to conflict with. The portfolio-keys volume keeps the fingerprint consistent across restarts so this only happens when you wipe and recreate the volume.
Useful Commands
# Live container logs
docker logs -f portfolio-ssh

# Check container status
docker ps

# Restart container
docker restart portfolio-ssh

# Check what's listening on port 22
sudo ss -tlnp | grep :22

# Test Nginx config
sudo nginx -t

# Reload Nginx after config change
sudo systemctl reload nginx

# Check SSL certificate expiry
sudo certbot certificates
Cost Breakdown
| Resource | Free Limit | Usage |
|---|---|---|
| e2-micro (us-central1) | 744 hrs/month | 744 hrs ✅ |
| Standard disk 30 GB | 30 GB/month | ~5 GB ✅ |
| Static IP (attached) | Free | Free ✅ |
| Total | ₹0/month |
At this point you have something most developers never build.
A service that speaks SSH, runs inside Docker, proxies alongside a live website, and turns any terminal into an interactive portfolio.
All running on a free VM.
Not bad for a project that started as a weird idea.
Want to understand the thinking behind why this exists? Read the story → My Portfolio Has No URL. Just an SSH Command.